Image View
The Image View is the main window in Compressonator GUI. It is where you can view a wide variety of source image formats, see the results of compression, inspect image analysis metrics, and much more.
To open an image in the Image View you must left-click on the image icon next to an item in the Project Explorer. Multiple images can be opened simultaneously and switched between by selecting the appropriate tab at the top of the Image View.
Viewing Images
The Image Viewer in combination with the Project Explorer allows users to view a large variety of image formats. Ref Adding Addition Image Formats on what formats are supported.
Note: In some cases viewing an image may take some time to display if the CPU is used to decompress a large compressed image item.
- To display an original image view, single mouse click on the item on the Project Explorer.
- To display a destination item image view double click mouse on the Item on the Project Explorer.
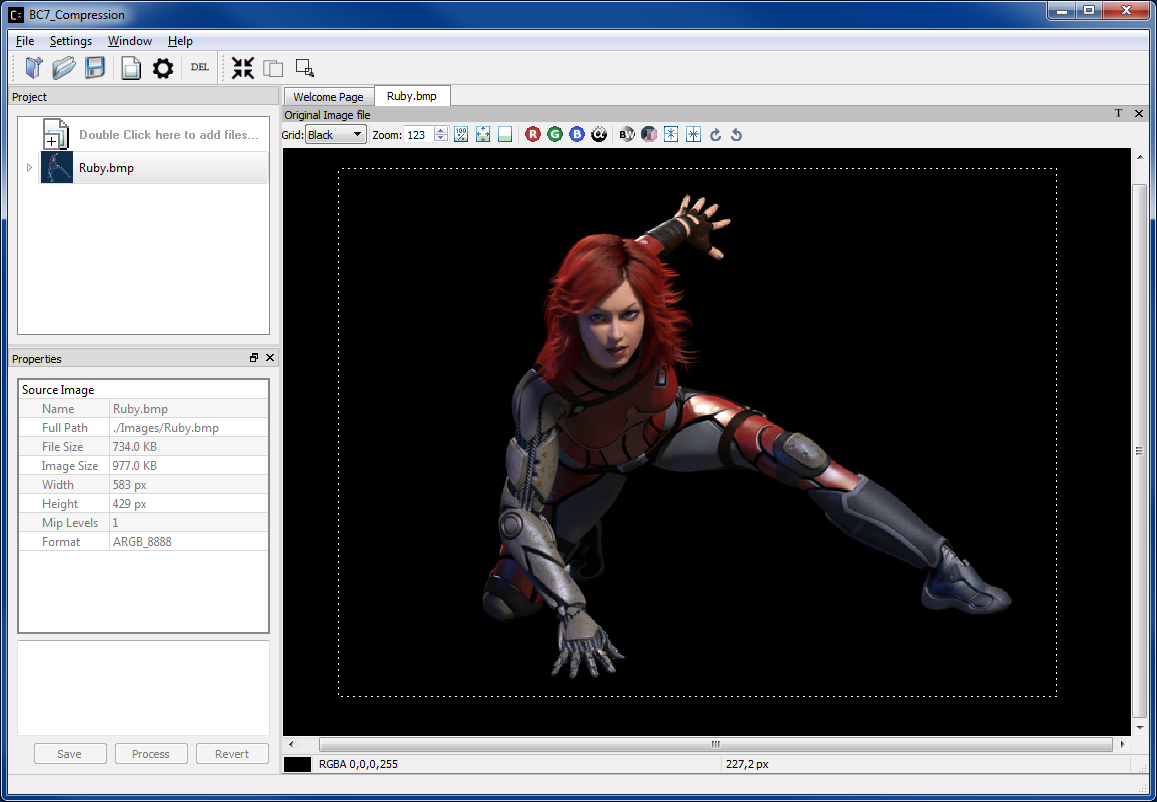
Image View of Ruby.bmp
To view a processed image (Project Explorer destination item with a green circle), double click on it (Ruby_bmp_1 in this example) and you will see another Image View tab window appear displaying the processed image.
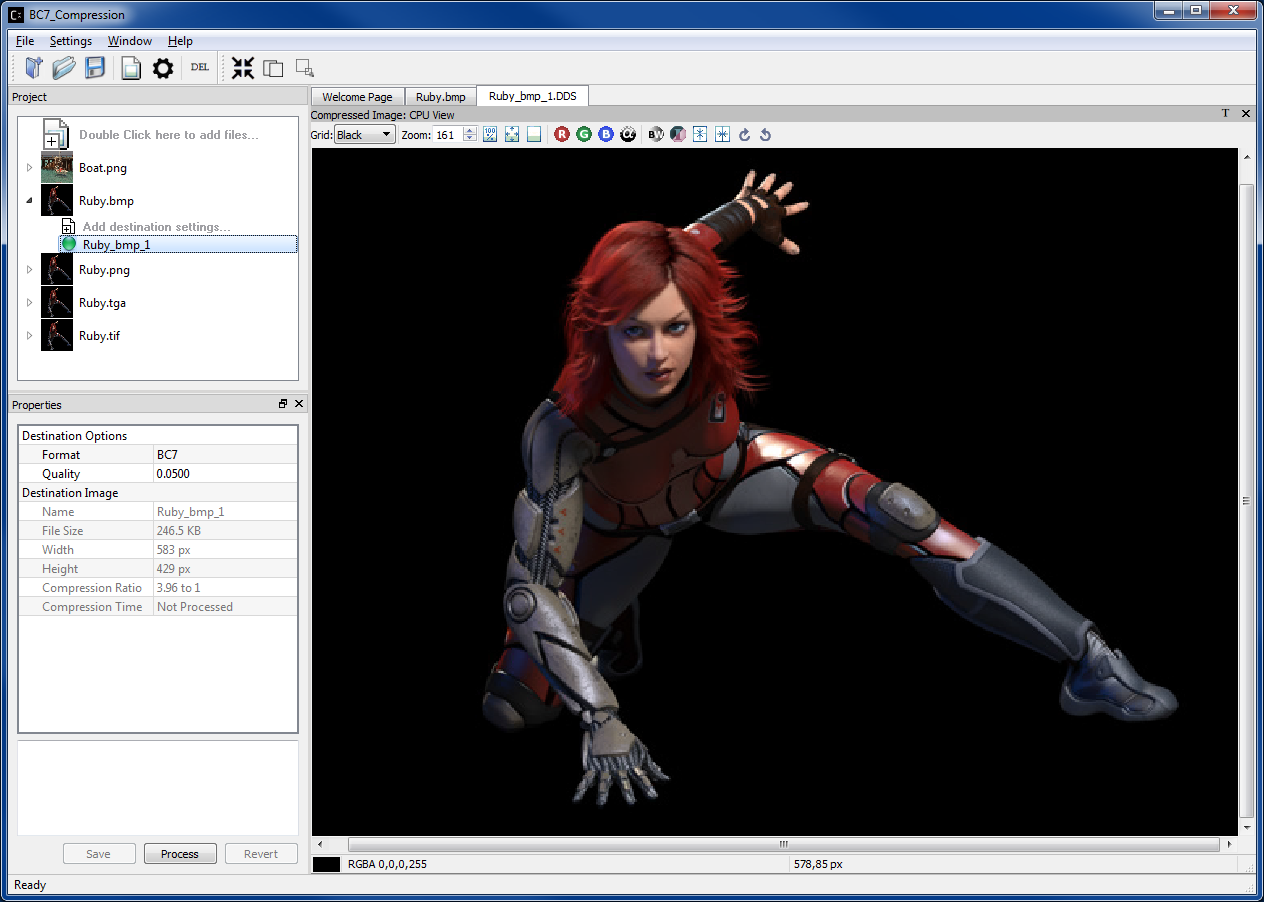
BC7 Compressed Image View of Ruby_bmp1.dds file
Users can capture viewed images to file using context menu “Save View as” or keyboard keys Ctrl C (displayed image), Alt C (original source image) to save to Windows Clipboard.
Image view context menu (enabled by right mouse button click)
Cursor positions in block increments is also displayed, users can now save any block to file using “Save Source Block … as” where … is the current cursor location translated to a block position.
Image view status bar showing cursors block position

This feature is useful in capturing the source texture blocks that was used for generating compressed blocks that exhibit decompressed image artifacts or poor quality. Depending on the source, a 4x4 block image is saved to either BMP or EXR file formats, which can later be used for repeated analysis.
Using a Mouse Wheel for Zoom
Rotating the mouse wheel in or out will also zoom the image in increments of 10. To zoom at a faster rate (increments of 100) hold down the keyboard Ctrl key and rotate the mouse wheel. Zoom will be centered on the current mouse cursor location.
Using the Mouse to Move the Image in the View
To move the image around the view, place the mouse over the image and press down the left mouse button. While keeping it pressed, move the image around the view. To stop the move, release the left mouse button.
Note: you can only perform these operations when the mouse cursor is over the image.
Adding additional Image Formats
There are a number of default image file formats that are supported by the application
| Format | Description |
|---|---|
| BMP | Windows Bitmap |
| PNG | Portable Network Graphics |
| EXR | High Dynamic Range Images |
| DDS | Direct Draw Surface files |
| KTX, KTX2 | Khronos Texture Files |
| TGA | Targa Texture files |
| TIFF | Tagged Image File Format files |
Support for EXR, TGA, DDS and KTX are linked into the main application and cannot be overwritten
Users can add additional file format by placing appropriate Qt Image plugins into \plugins\imageformats folder.
KTX2 Support Notes
KTX2 is supported by a DLL in the plugin folder AMD Compress\plugins\imageformats and at the root folder as ktx.dll it supports saving and loading multichannel images, BCn, and ETCn codecs.
The following custom image formats supported in Compressonator KTX is not available in KTX2 ATC_RGB,ATC_RGBA_Explicit,ATI1N,ATI2N,ATI2N_XY, DXT5_xGBR, ATI2N_DXT5, DXT5_xGBR,DXT5_RxBG ,DXT5_RBxG,DXT5_xRBG,DXT5_RGxB and DXT5_xGxR.
For ATI1N use BC4 and for ATI2N use BC5.
Additional support for universal textures and streaming can be added upon request. For specific KTX2 feature enablement, please file a request at https://github.com/GPUOpen-Tools/compressonator/issues
Image View switch between Original and Processed
This feature allows users to switch quickly between Original Image View and Processed Image View (Processed refers to Compressed Image View or Pixels Difference Image View) by simple key stokes (O or P) or from the Image View bar dropdown list. This allows users to have a visual comparison between Original and Processed images.
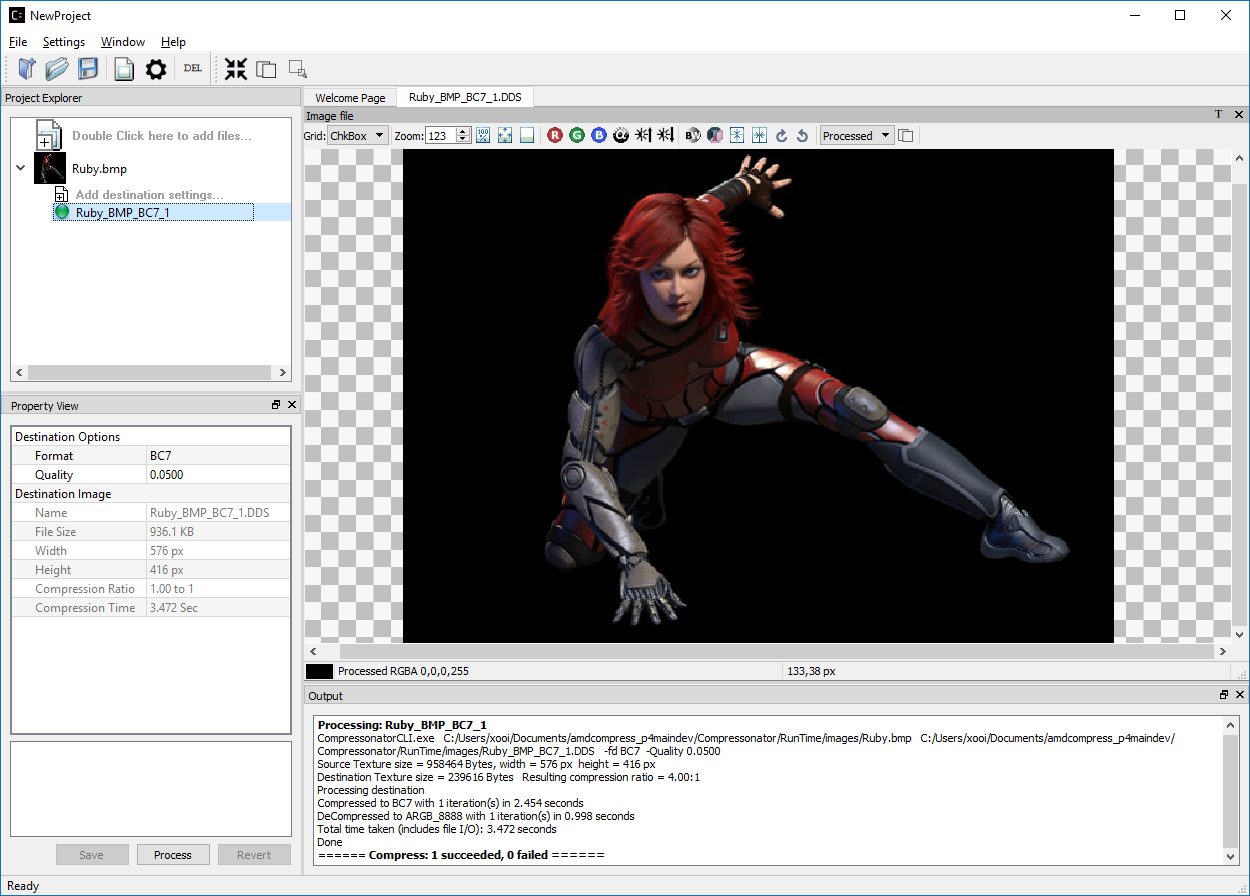
After compressing image, click on the green circle beside the compressed Image to generate the image view window as shown below:
Click on the Image View window to set focus, then hit “Space” bar to
switch between Original and Processed (In this case, Processed refers to
Compressed Image) Image Views. You can also switch between Processed and
and Original Views by select the related views from the combo drop down
list 
To change the Processed Image View to Image Diff View, click on the icon
 beside the , observed that Processed View now
shows Image Diff View (In this case, Processed refers to Image Diff),
you can switch between Original and Image Diff View by hitting the
“Space” bar. Note: You may need to increase the Image Brightness by
clicking on
beside the , observed that Processed View now
shows Image Diff View (In this case, Processed refers to Image Diff),
you can switch between Original and Image Diff View by hitting the
“Space” bar. Note: You may need to increase the Image Brightness by
clicking on  to view the Processed Image Diff.
To change the Processed Image View back to Compressed Image View, click
on the same icon .
PSNR Image Quality Metric

When viewing the compressed result of an image some analysis metrics are calculated and can be viewed. One such metric is the PSNR. It can be seen in the status bar at the bottom of the image view and updates based on which mipmap level or cubemap face is currently being viewed.
The PSNR value can be used to numerically compare the quality of various types of compressed images and filter options applied to an image.
